Turkey Pumpkin Chili


Here’s my recipe. It turned out great!

turkeychili-2017

  • 1 1/2 pounds ground turkey
  • 2 tablespoons olive or coconut oil
  • 1 cup chicken stock
  • 1 onion
  • 1/2 red pepper
  • 1/2 yellow pepper
  • 1/2 orange pepper
  • 1 poblano pepper
  • 1 – 2 habanero peppers
  • 4 garlic cloves
  • 1 shallot (because I had it)
  • 1 15-ounce can tomato sauce
  • 1 15-ounce can pumpkin
  • 1 6-ounce can green chilies
  • 1 can kidney beans, partially drained
  • 1/2 teaspoon ground oregano
  • 1 teaspoon celery flakes
  • 1 teaspoon dried parsley or cilantro flakes (or fresh if you have it)
  • 2 tablespoons chili powder
  • 1 tablespoon onion powder
  • Salt and pepper to taste
  • Chopped green onion
  • Grated cheese

Instructions

  1. Add oil to skillet, brown the ground turkey, then add to the crock pot.
  2. Deglaze the skillet with some of the chicken broth, and add to crockpot.
  3. Chop onions, peppers, garlic, and shallot, sautee them in more oil until soft and a little browned, then add to the crock pot.
  4. Deglaze the skillet again with some chicken broth, and add to crockpot.
  5. Add remaining ingredients to crock pot.
  6. Stir well and add salt and pepper to taste.
  7. Cook on high for 1 hour.
  8. Cook on low heat for several more hours.
  9. Garnish with green onions and grated cheese to taste.

Yield: 8 2-cup servings, 22 grams carbohydrates each

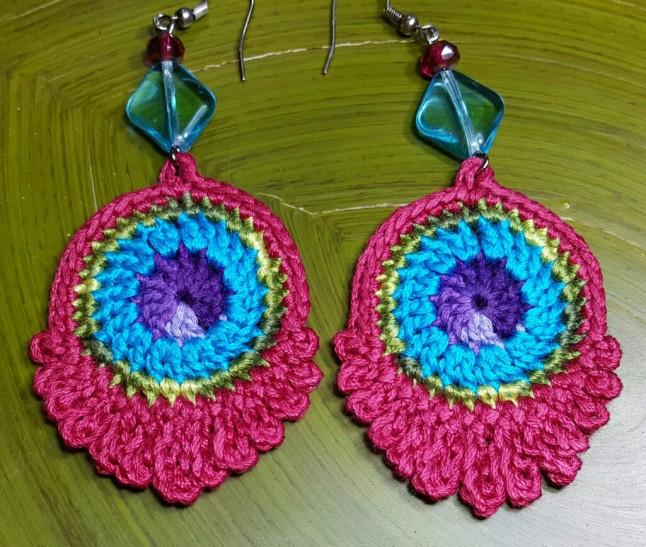
Crochet Peacock Feather Earrings


I just put my newest crochet pattern in my new Ravelry Shop. Check it out!

These are so fun to make. I’ve used DMC embroidery floss, and also some of the cheaper brands you can get in bulk at craft stores or Walmart. I like them equally as well, each for different reasons. The DMC is kind of “crisp” and shiny, and the Iris brand I got at Walmart is a little softer and not so shiny. It’s all personal preference.

I really like experimenting with the variegated floss as well. You can see I used 2 in the picture below. I’m going to try some metallic floss too.

You can buy the pattern if you want to try it out!

peacock

Yellow Grape-Tomato Baked Bruschetta


Murray Park - Cheif Wasatch

This is a wood sculpture at the entrance of Murray Park, of Chief Wasatch. He is who the Wasatch Mountains are named after. He is magnificent-looking.

OK, another foodie blog tonight. I was planning to spend Saturday morning reading in luxury… ahh… Saturdays are heaven. But before I got started on the reading, I checked my email and saw that some new people had found my blog after I posted the last one about the “Caprese Broil”… So I had to go check out their blogs, and someone mentioned their local farmer’s market. Hmmmm… got me thinking.

I had bought some more tomatoes the night before, to try out some more versions of my tomato basil concoction; but they weren’t really ripe enough yet. So when I read about the Farmer’s Market, I thought, maybe I could find some really fun and unusual tomatoes… stuff I never see at the grocery store here.

Murray ParkSo, I threw some clothes on and brushed my hair into a clip, and off I went on a little adventure to Murray Park. It’s such a nice park, and I hadn’t been there in years. It’s really green, and Little Cottonwood Creek runs through it. I’ll have to get my family to have a picnic there sometime soon. It was so great to get out of the house and enjoy the outdoors!

The Farmer’s Market is in the south east parking lot. To the south there are big grassy hills, and to the east you can see the Wasatch Mountains in the distance. There were probably about 30 or 40 booths. The selection is pretty basic—tomatoes, cucumbers, onions, peppers, peaches, pears, grapes, berries, etc. Ooo, and a booth with amazing tamales. I stood in line for 20 minutes for those! But I didn’t find the exotic heirlooms I was looking for. However, there were some baby grape-sized yellow tomatoes, and some small golf ball-sized orange ones. So I went home with those and some baby romas.

Here are the pictures I took at the Market:

So, I didn’t ever get my reading in, but Saturday night I made a tasty “Caprese Bake” with the tiny round yellow tomatoes. It turned out sooooo yummy. (I failed to get pictures of my tomatoes before cooking them! Ack! Blog Fail. But… keep reading. I did get pictures of the after-baked version.)

Here’s the “recipe” (quotes, because I don’t have amounts, sorry… I was just drizzling here and throwing in there…):

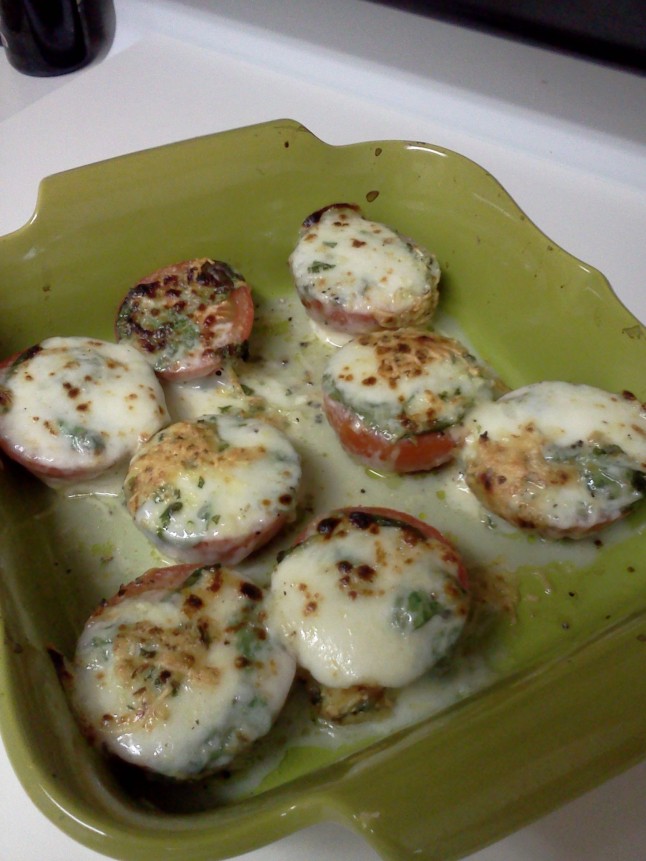
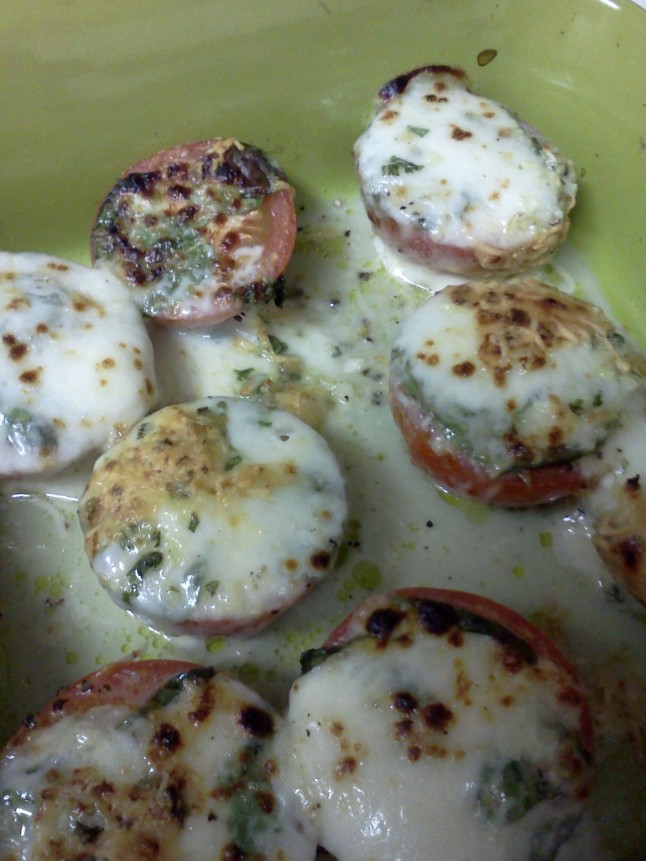
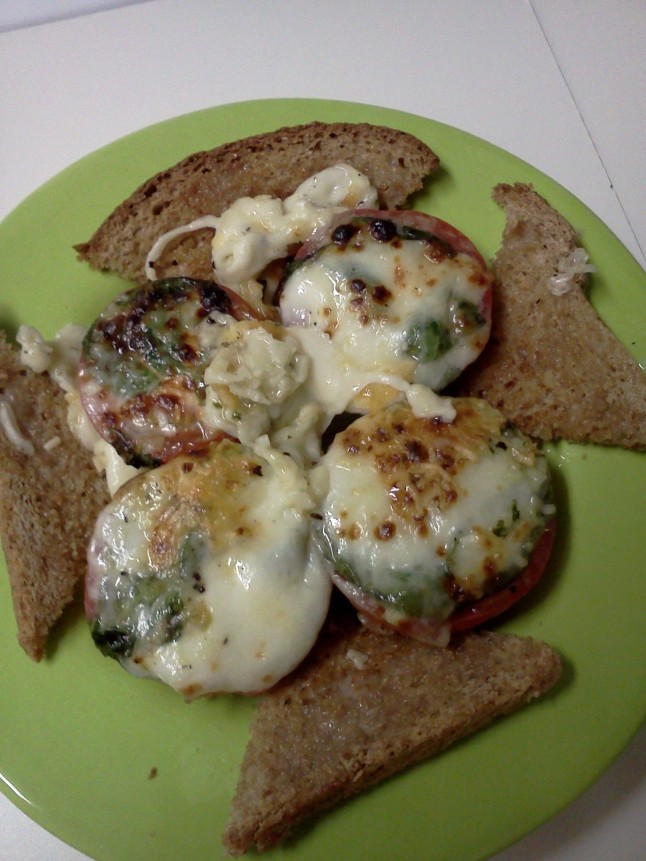
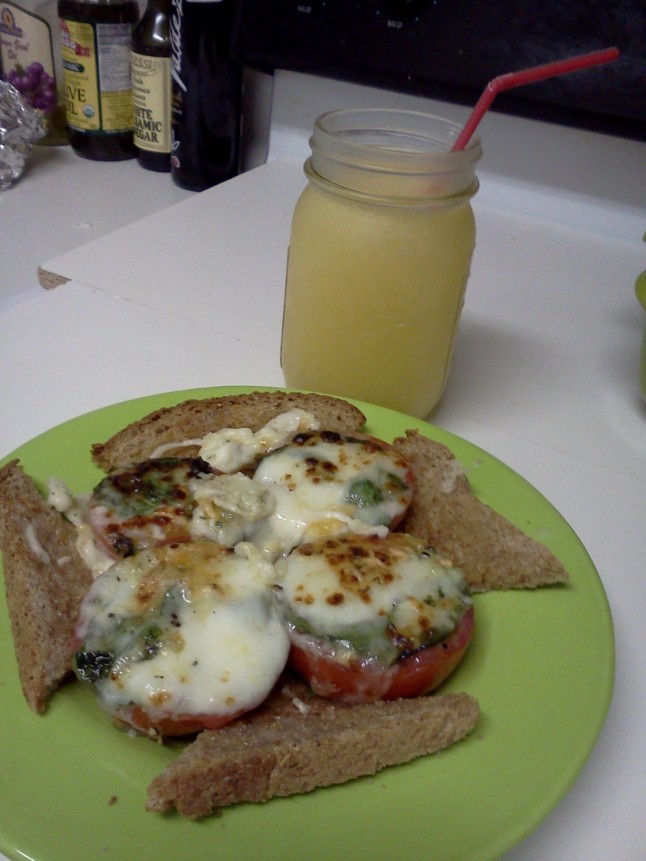
I cut the tiny tomatoes in half, and covered the bottom of a small casserole dish. Then I generously drizzled olive oil, white balsamic vinegar (my favorite Alessi brand), chopped up mozzarella, and chopped basil. I stirred it all up then baked it for almost an hour at 375 F. Then I toasted some yummy walnut bread that I bought at the Farmers Market, and drizzled it with olive oil, and rubbed garlic on it. Then, even though it was so pretty right out of the pan (see the first picture below), I stirred it up, which made the cheesy juice and the cooked-down white balsamic all come together and made a baked bruschetta-like pasty mixture. Once I got the stirred mixture just right, I spooned it onto the toast, and topped with some grated parmesan. THEN, the thing that puts it over the top, is drizzling it with reduced balsamic vinegar (regular dark balsamic this time.) Oh my gosh, it was perfect.

(To make the reduced dark balsamic vinegar, I put almost a cup of regular balsamic vinegar in a pan, and boiled/simmered it until it was about 1/4-1/3 cup. It only took about 10 minutes) I just drizzled a little over the toast and tomatoes. Mmmmm, mmmmmm. Heaven on toast.

Let me know if you try making this, and how it turned out. I made it again tonight at my Sister’s house, with the golf ball-sized orange tomatoes. It was just as yummy!

I’ll have to go perusing my new blog-friends’ sites to find new food combos to get obsessed about. Well, once all my tomatoes and basil are gone.

My Caprese Broil


A yummy caprese salad

I saw a photograph somewhere online the other day, with a pan full of roasted tomatoes with basil on top. It reminded me of my favorite salads, the Caprese. So I went to the store and bought all the fixins last night, and made the most yummy “Caprese Broil” you’ve ever tasted, served on whole wheat toast.

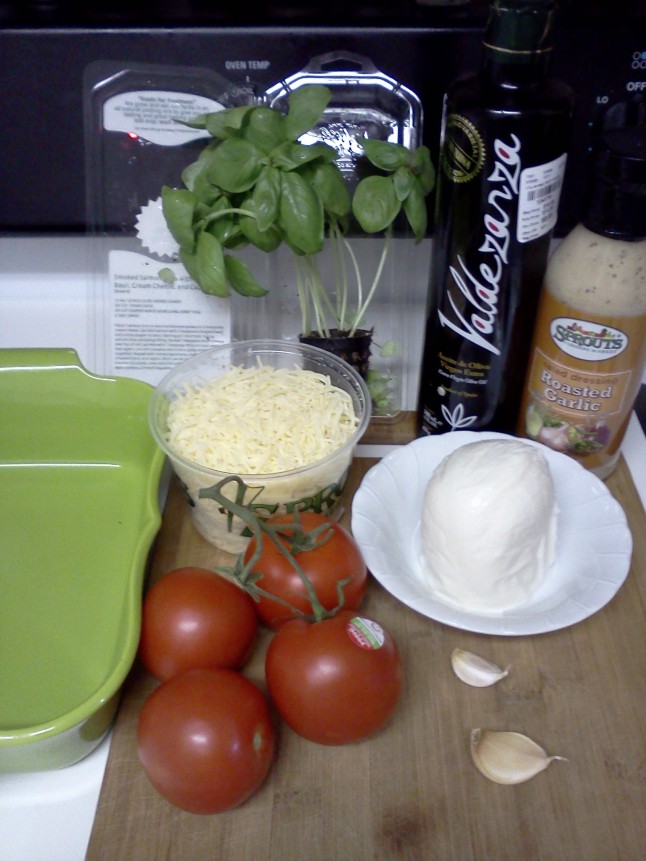
All the fixins.

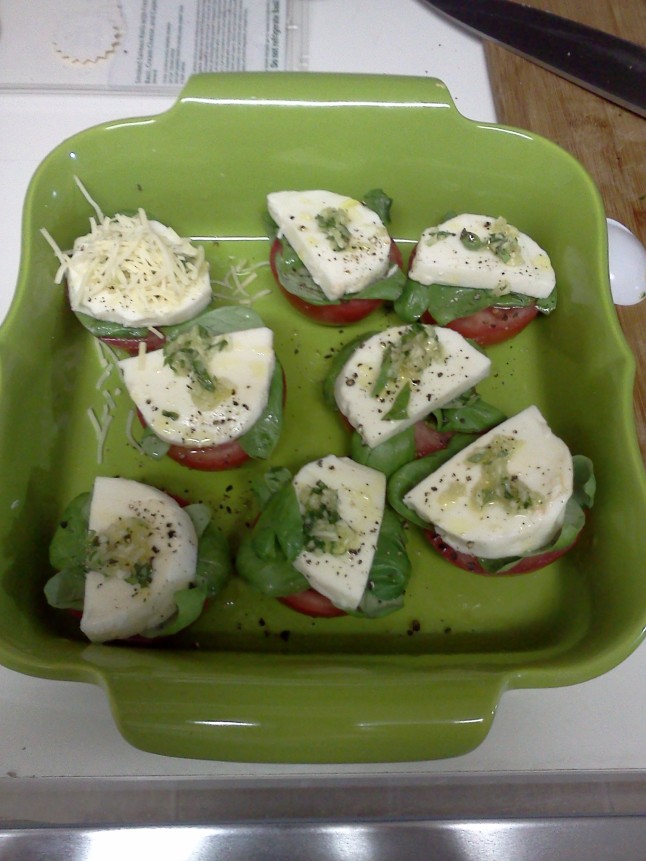
Made up fresh.

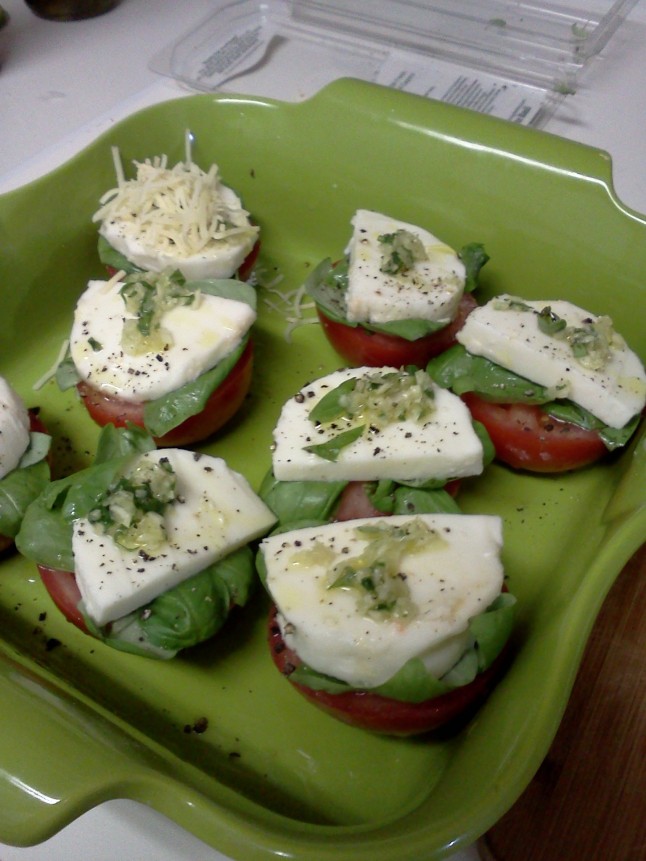
Mmmm, already looks good.

After 7 or 8 minutes under the broiler.

Mmmm, can’t wait to dig in.

That super-carmelized one was the best.

Next time I’m going to try a Caprese Bake… Torn up toasted bread, rough-chopped tomatoes, torn fresh mozzarella, lots of chopped fresh basil, garlic, olive oil, and parmigiana cheese. Then I’ll bake it. And drizzle balsamic vinegar and olive oil on top. Mmmm, can’t wait.

Dalek Cookie Fail – But We Recovered!


My nephew, Holden, is at BYU now, so I get to spend more time with him! He’s 18, and it’s his first time away from home. He suggested that for Labor Day we have a Dr. Who marathon, and make a Dr. Who cake.

I drove down to Provo to pick him up from his apartment, then we met my sister Sue and went to a very yummy Thai food restaurant in Lehi. It’s in a big old house, re-purposed into a restaurant. They have the absolute BEST pumpkin curry I’ve ever tasted. After some tom ka soup, spring roll, pumpkin curry and sticky rice with mango, we left with tummies full and satisfied. Holden said he liked his first foray into Thai food. He got satay with his dish, and that looked mighty tasty!

So, back to the Dr. Who marathon… I looked at lots of ideas online, and decided Dalek cookies would be easier than a 3-D Tardis cake! I found some pictures online that looked cute, and a picture of the real thing for reference:

Before we got our cookie dough done, my niece (she and Holden are cousins), Hye Soo, and her family, Eric and Lennon stopped by to partake in the Dr. Who marathon for a little while. We ended up doing more talking and goofing off than watching TV while they were there. Lennon, the little almost-2-year-old that he is, is always a blast to play with. He pre-empted Dr. Who for awhile and watched Yo Gabba Gabba, his favorite show. (Yeay for Netflix!)

We also took a gander at Hye Soo’s new very cute teapot set. We must have a tea party soon. We’re green tea fans:

Well, back to the cookies… they were a bit of a fail… the dough had not chilled long enough, and plus I despise shortening, so I used all butter in the recipe. Annnd… since butter has water in it, I think that added a little too much moisture… so as you can see below, just getting the cookies cut out into the right shape was a bit of a challenge, since the dough was soooo sticky and loose. You’ll see below how they turned into great big blobs. But we did a little after-oven shaping with a pizza cutter, and decorated a few up. They turned out cute enough. And they were still tasty. It was a lot of fun.

A Rose—Part II


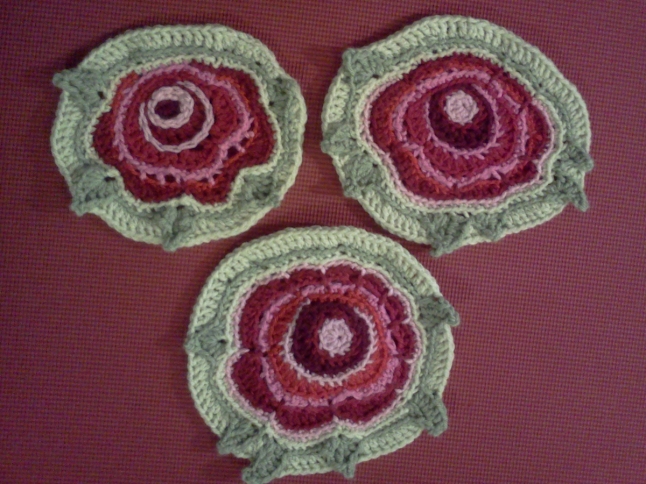
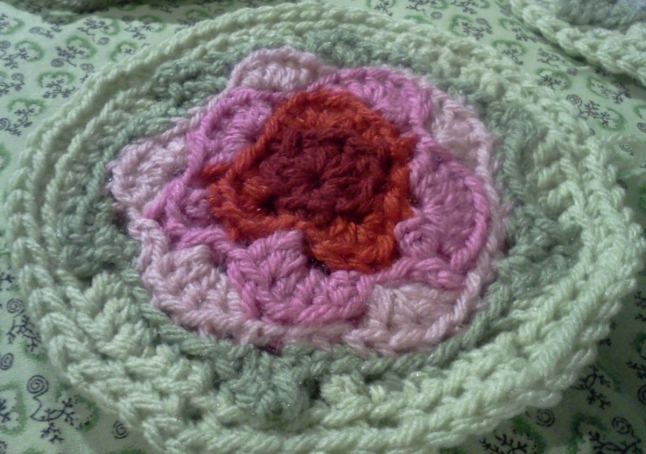
OK, here’s my second stab at free-form roses. I like these better. When I get it down just like I like, I’ll make a pattern up. But for now I’ve just been winging it. I sort of decide what to do as I go.

Free-form crocheted roses

My 2nd attempt at a free-form crocheted rose motif.

Free-form crocheted rose motif.

I think this is my favorite so far…

free-form crocheted rose motif

I’m not sure about the light pink center… hmmm…

Free-form crocheted rose motif.

On this one I added some embroidery… There are things I like about this one… and things I’m not sure about…

As always, I welcome comments… any pointers or ideas?

Thanks! Happy Crocheting.
~Karen

A Rose is a Rose is a Rose


I’m really excited about this project. For the longest time, I’ve been collecting yarn in all shades of red and pink, with the idea of eventually making a rose afghan for my mom. I’ve looked and looked for rose motif patterns in crochet, but have never really found what I wanted. I realized that it’s because what I want is more of a free-form look,. rather than an “equilateral” design (is there a better word than equilateral? Mirror-image? You get the drift). I actually found one pattern that I liked a lot… and made this motif:

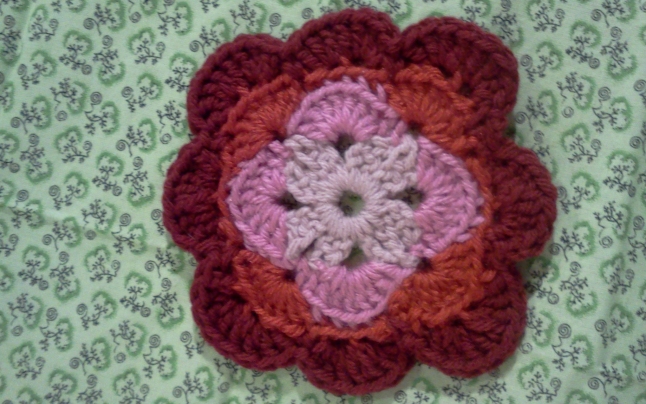
Rose granny square

Flat Rose Granny Square. You can buy this pattern from Nicole Rodgers for just $1. Isn’t it pretty?

While I really love the way this looks, and will definitely use it for a different project (Maybe a handbag or purse? Any other ideas?) it is still not the free-form look of a rose that I really wanted. So… I decided to try out my skills on making up my own design. I had tried this awhile back after I first learned to crochet, but it was a bit disastrous. Too bad I frogged the result, or I’d show you here. Anyway, I guess I’ve gotten better, because I really like what I’ve come up with so far:

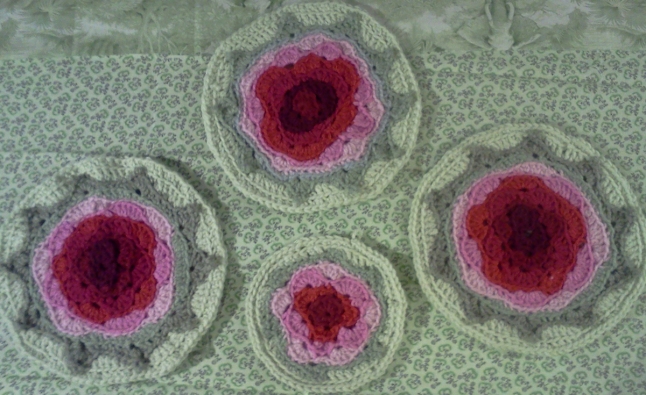
Free-form rose motif by Karen Brimhall

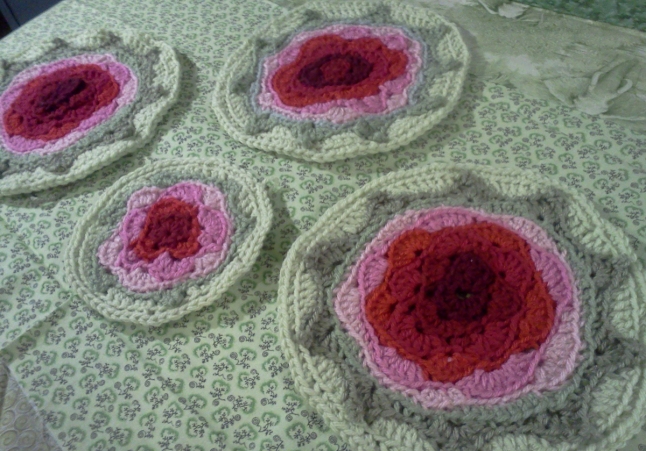
Free-form rose motif—the big ones are 9 inches across, and the small one is 6 inches.

Free-form rose motif in two sizes

Free-form rose motif in two sizes

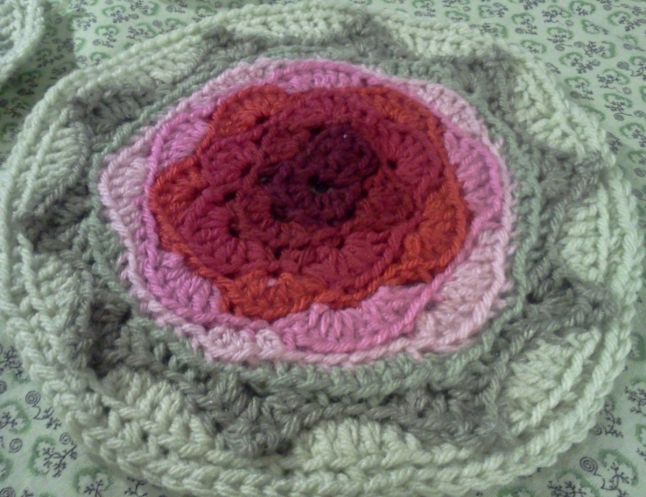
Large (9=inch) crochet free-form rose motif by Karen Brimhall

Large (9-inch) crochet free-form rose motif

Medium (6-inch) crochet free-form rose motif by Karen Brimhall

Medium (6-inch) crochet free-form rose motif

Drawstring for the Mesh Bags


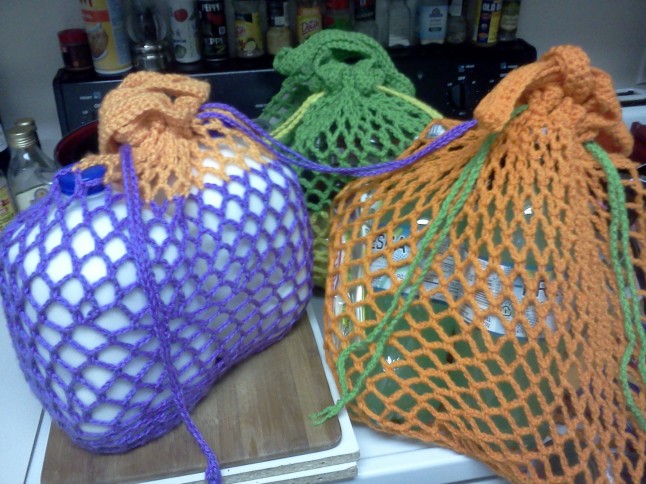
Drawstrings improve the functionality AND look pretty cute!

Earlier I posted about the mesh reusable grocery bags I was making. There was one problem with them, which was that when you filled them all up, then sat them down in the back of your car or on you kitchen sink, the opening would just flop down and everything in it would go spilling out. I tried tying the handles, but they wouldn’t stay tied very well.

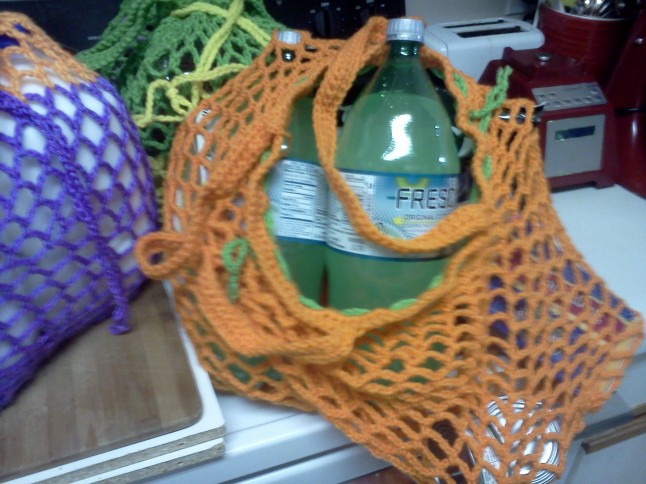
Reusable mesh grocery bag without the use of drawstring

Reusable mesh grocery bag without the use of drawstring (There IS a drawstring here, but I’m just demonstrating what happens when it is not used. I never got a picture of this before I put the drawstrings on.)

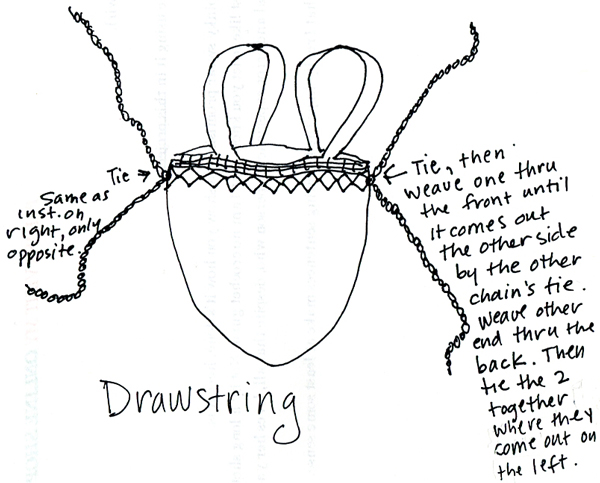
So I just made 2 foundation chains slightly longer than the circumference of the bag. To show you how I installed the drawstrings, I have to resort to this crude little sketch—since I forgot to take pictures while I was doing it! But I think the sketch gets the job done.

Instructions for installing a drawstring.

How to install the drawstrings.

And then, voila! ( I noticed I’m using that word a lot. I’ll have to think of some alternatives…)

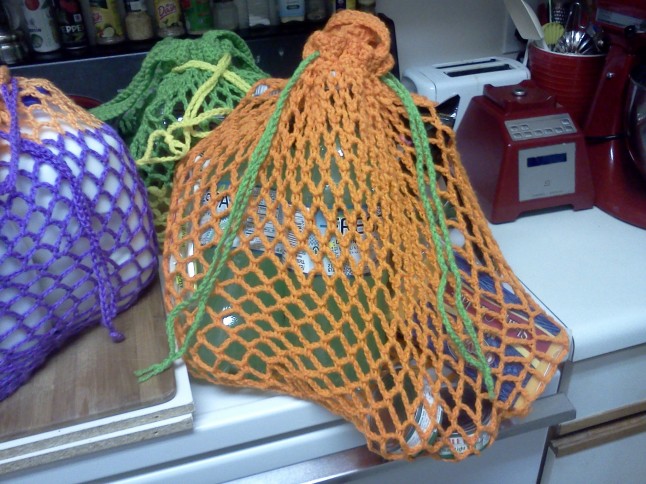
Cinched drawstring on reusable mesh bag.

All cinched up! No need to tie the drawstrings; they stay closed, at least with the yarn I used.

Reusable mesh market bags, cinched tight with drawstrings.

Super secure and tidy groceries in your reusable mesh bags! Notice how there are TWO jugs of milk in that one bag. And I could still jam a BUNCH of stuff in there. Sure makes hauling the bags into the kitchen from my apartment parking stall a ton easier.

Let me know if you try adding these nice little drawstrings to your mesh bags, and if you come across any pointers along the way, please share.

Happy grocery shopping!

P.S. FYI, the purple and “mango” bag is Caron Simply Soft (I tell you, I have a ton of the stuff, left over from my hexagon afghan.) and the other two are Red Heart Super Saver. You really can’t beat the cheap price, and the acrylic is super strong. Not to mention a great selection of colors. I like the look of cotton, but it is not as strong, and more expensive. Hemp is supposed to be the strongest… but a bit too pricey for my budget. (-:

I usually use my US K / 6.5 mm crochet hook.

Lacy Bunting / Banners


Bunting

I made up this pattern awhile ago, and made several of the triangles… and now this project is on my list of crafts to finish! I was organizing all my crochet and knitting patterns tonight, and came across the pattern I had scribbled on a pad of paper, and thought I’d share. I really like these lacey-ish bunting triangles. Someday I’ll finish them. (:

So here is a picture of several of them that I did finish:
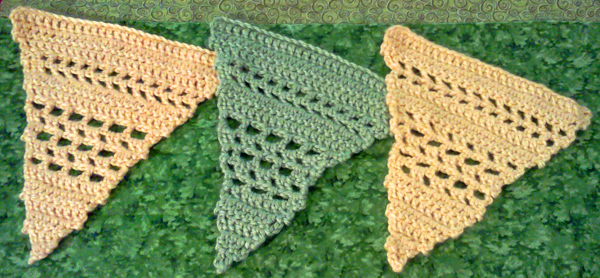
Crocheted lacy bunting / banners

Crocheted lacy bunting / banners.

Here is the visual pattern that I scribbled out when I created these:
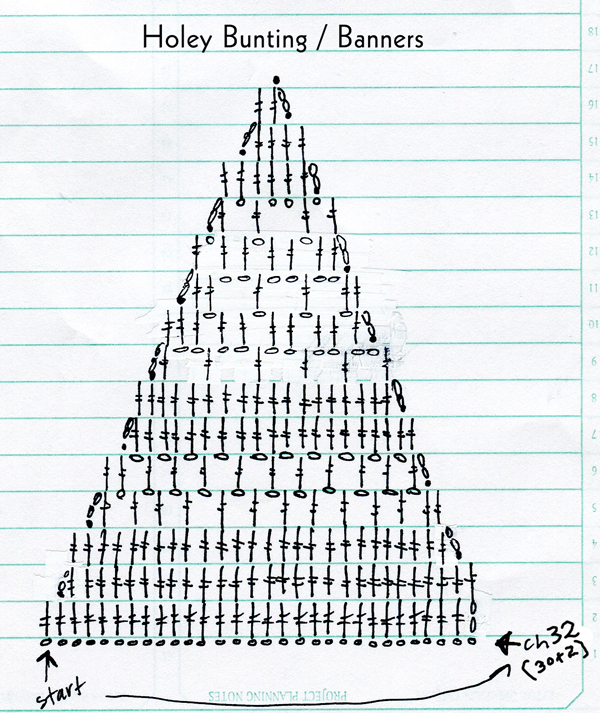
Lacy crocheted bunting - pattern diagram

The pattern for my lacy bunting.

OK, I’ll attempt to write the pattern out:

I used Caron Simply Soft in Sunshine and Pistachio, mainly it was what I had. I can’t remember what size hook, but it was probably the recommended size on the skein label.

Start: Ch 30.

Row 1: Ch 2 more (counts as dc). Dc in 4th chain from end, then dc all the way across  in every ch (29 dc + the ch 2 = 30 dc).

Row 2: *Sl st in 2nd dc, then ch 2. Dc in next dc. Dc all the way across*. (28 dc + the ch 2)

Row 3: Repeat from * to *. (26 dc + the ch 2)

Row 4: Sl st in 2nd dc, then ch 2. *(Dc in next dc, then ch 1)* 11 times. Dc in next 2 dc.

Row 5: Sl st in 2nd dc, then ch 2. Repeat from * to * 10 times. Dc in next 2 dc.

Row 6: *Sl st in 2nd dc, then ch 2*. (Dc in ch 1 sp, dc in next dc.) 10 times. (20 dc + the ch 2)

Row 7: Repeat from * to *. Dc all the way across. (18 dc + the ch 2)

Row 8: Sl st in 2nd dc, then ch 2. Dc in next dc, ch 2. (Sk 2 dc, dc in next dc) 5 times.

Row 9: Sl st in ch 2 sp, dc in same ch 2 sp. (Ch 1, sk next dc, dc twice in next ch 2 sp) 4 times. Dc in next dc.

Row 10: Sl st in 2nd dc, ch 2. Dc in next dc. (Dc in ch 1 space, ch 2, sk 2 dc) 3 times. Dc in next ch 1 sp, Dc in next dc.

Row 11: Sl st in 2nd dc, ch 2. (Dc twice in ch 2 sp, ch 1, sk next dc) 3 times. Dc in next dc.

Row 12: Sl st in ch 1 sp, ch 2. Dc in next dc, ch 1, skip next dc. Dc in next ch sp, ch 2. Sk next 2 dc, dc in next ch 1 sp. Ch 1, sk dc, dc in next dc.

Row 13: Sl st in 2nd dc, ch 2.  Dc in next dc, Dc twice in ch 2 space, Dc in dc, dc in ch 1 sp, dc in next dc.

Row 14: Sl st in 2nd dc, ch 2.  Dc in next 4 dc.

Row 15: Sl st in 2nd dc, ch 2. Dc in next 2 dc.

Row 16: Sl st in 2nd dc. Fasten off and weave in ends.

When all the bunting triangles are done, chain however long you want the tails to be, then single crochet across the top of each triangle, connecting them all, then chain an equal number for the other tail. Then I like to do another row of single crochet all the way across. I believe this is how I did it when I made the bunting in my bedroom.

Voila! Let me know if you try out my pattern, and if you see any problems I will fix it.
File Cabinet Refinishing Project


The project

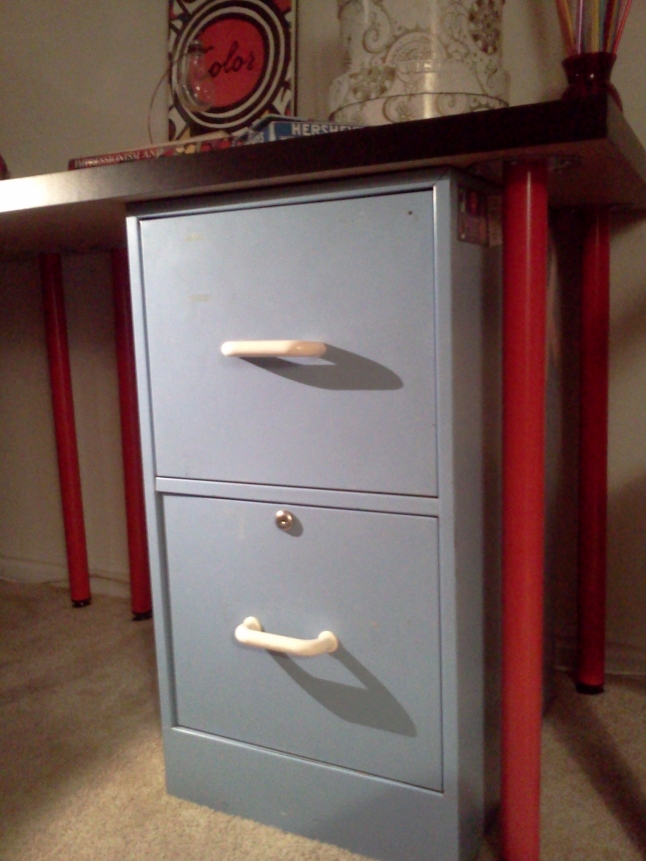
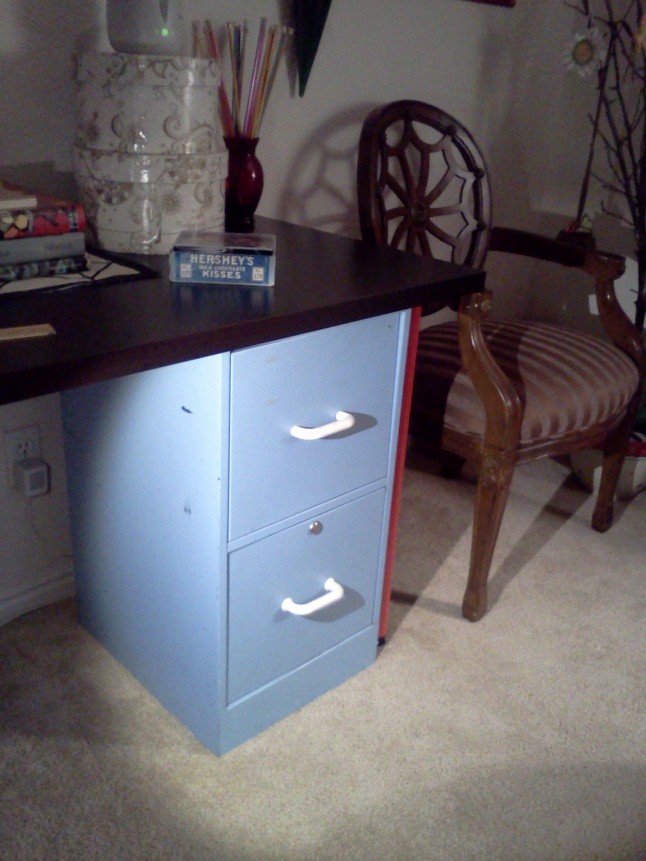
Well, I just moved my office space into my living room. (Desks are IKEA Vika Amon with Adils legs in red.) So now my tiny living room duals as my office as well. I just wanted my office OUT of my bedroom. I’ll post complete pictures of the office space later when I’m done setting it up/decorating, etc.  But for now, I want to re-finish my old blue filing cabinet. Here she is: (you can see a sneak peek of the room she sits in, which I’m still working on)

Ideas

I’ve been looking for ideas on the Internet—there is not as much as I thought there would be. Here’s what I found out there:


My thoughts

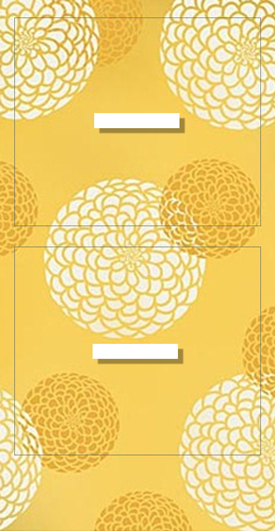
I looked at a bunch of stencils, and I’m leaning towards spraying the file cabinet green, and using some sort of floral, damask, or paisley stencil on the front. Something large, that will not be just on the drawers, but maybe overlap beyond the doors, and maybe even have it go around a corner to the side… Here are a few quick sketches that I’ve done so far for ideas:

I like this stencil. I was thinking the flowers you see on the front would overlap over onto the sides, but other than that the sides and top would be solid green.

Same idea

I like the zinnias… But I would do it in greens instead of yellow. I will also have to find the stencil… This was just a picture of a wall painted this way…

I love this one… I’m still a sucker for sunflowers… I like how it’s simple and leaves a lot of green.

What do you think? Any ideas?